Tuesday, June 22, 2010

How to resize your BOOTCAMP partition

Okay. You've made a bootcamp partition, have installed stuff on it, and have run out of space. You want to get more space w/out re-installing everything. Here's how:
1. Download WinClone (http://www.twocanoes.com/winclone/).
2. Install and open.
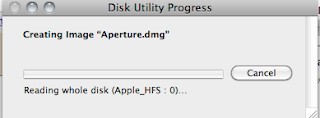
3. Click 'Agree', and then in the new window (pictured below), click 'Image' once it finishes loading. Save it on your desktop and name it 'Image'. Enter your password when prompted. Then, it'll take a while while it images the bootcamp partition. Once it is done, open BootCamp Assistant and delete your bootcamp partition. Now, open Bootcamp Assistant again and create a BootCamp partition with the new size you want. Once it is done, open WinClone and go to the 'Restore' tab. In the 'Restore Image' section, click 'Select Image'. In the popup window, go to your desktop and double-click the image file you made before. In 'Destination', select your new Bootcamp partition. Click 'Restore'. If asked for your password, enter it. Once restored, in WinClone, got to Tools > Expand WIndows (NTFS) Filesystem. Click 'Expand'. Done! Within a few hours at most, you should have a resized bootcamp partition!

Monday, June 21, 2010

Force CD-DVD Eject

Hey guys- if u have a dvd/cd that shows up in your computer, but when you click eject in any app, it doesn't eject, here's something you could try:
1. Open Terminal
2. In the 'Shell' menu, click New Command. Type the following:


drutil tray eject

Click 'Run'
 Hope it works :-) Cya!
--
elite.mac2@gmail.com

Saturday, June 19, 2010

How to install Windows w/ bootcamp on a separate hard drive from the one w/ mac (Requires a Mac Pro)

Ok guys- I FINALLY figured out how to have windows on a separate hard drive. You can only do this on a Mac Pro w/ atleast two hard drives (one is the one on which mac is installed, and one has to be blank). If you already have a bootcamp partition, copy your important files  from your bootcamp partition to an EXTERNAL drive/usb, use Bootcamp Assistant to delete the Bootcamp Partition, and only THEN follow the following directions. You will also need to make sure that your mac boot drive is not named 'Macintosh HD'.


Part 1- 
1. Insert your Mac OS X Install DVD in the CD/DVD Drive. restart holding the Option key until a white screen with the boot drives and DVD appears. Use the keyboard arrow keys to move to the DVD, and press enter.
2. Once it boots, press 'Next' or 'Continue'. Now, in the top menu, go to Utilities and then go to Disk Utility. Once it opens, select the BLANK HARD DRIVE in the left sidebar and then go to the 'Erase' tab. Select the Format as Mac OS Extended (Journaled), and give it the name 'Macintosh HD'. Now click 'Erase'.
3. Close Disk Utility and start Installing Mac OS X. Where it asks you which drive to install it on, select the Drive you created in Step 2. Install Mac OS X. This will take a while.
4. Once it is installed, it will ask you if you want to transfer info from another Mac. Select the option 'Another volume on this computer', and select the drive which currently is your mac drive (the one which has mac installed). This will also take a while, and now your new mac drive named 'Macintosh HD' is exactly what your previous mac was. It will now reboot into your new mac drive. Skip registration, etc., and reboot into your original mac drive by holding down the option key while booting. 
5. Once you are in your original mac, go to part 2...

Part 2-
1. Back up your important mac files manually or with Time Machine to a NETWORK or EXTERNAL drive (Note: this is optional). 
2. Open the Bootcamp Assistant, located in the Utilities Folder in the Applications folder.


3. Now it will show you a screen which will allow you choose how much space to partition for the Windows drive. Drag the bar as much as possible to the left give Windows the most space, and then click whatever it says, like 'continue'. Sorry I can't show pictures of this screen- I already have done this and to do it over I would have to delete my Windows Drive :-(. Then, it'll give u 2 options. If you want to begin installing Win now, insert your Windows Install DVD and choose the reboot option, then click reboot. If you want to do it later, quit the Assistant. When u want to do it, insert the disc, open system preferences, go to 'Startup Disk', select the DVD, and click 'Restart'.

4. During the Windows Install, it will reboot many times. To prevent this from going wacky and hairy, before booting into the Win DVD (but after inserting it into your computer), change the startup disc to the Windows DVD. Only problem is, after it has installed Windows, it might boot into the disc again into the welcome screen. Use the power button to force shut down your computer, and then use the option key method to boot into your new Windows Drive. A wireless mouse and keyboard WILL NOT work right now, but that will be fixed later. For right now, get a wired mouse and keyboard if u don't have one, or borrow one. plug them in and get through the registration, user password, etc. processes when they come. Now, use Windows Explorer to eject the Win DVD and insert your Mac OS X Install DVD. In the autoplay window that pops up, select whatever the option is with the Silver Diamond symbol. Once the installer opens, install BootCamp. Just use all the preset options. Once it installs, it will reboot back into windows. 
5. Now, find the program 'Create a system repair disc'. In newer Win versions, you can search for it in the start menu. Create a system repair disc. For this you will only need a CD that is 700 MB large. Once it is created, eject it, insert the Mac DVD,and use the option key method to reboot into your Mac OS X Install DVD. Choose the language and then click 'Continue' in the next screen. Now, go to the Utilities menu and open Disk Utility. In the left sidebar, click your ORIGINAL MAC DRIVE PARTITION (the one NOT named 'Macintosh HD'), and go to the erase tab. Choose any name for it and click 'Erase'. This drive is now for you to save any files you want. It is now a storage drive. Now, shut down and then start your computer using the power button. Hold down option, as usual. If the windows drive shows up, then you are done! Just read the end of Step 1. If it does not, then:
     1. Use arrow keys to boot into the system repair disc. It will automatically attempt to repair your Win drive, If it doesn't automatically, then choose 'Startup Repair' in the main menu. Once done, reboot holding the option key. You now are seeing three drives to boot from: Macintosh HD, BOOTCAMP, and System Repair disc. Hold your eject key to eject the Disc. You now successfully have created two boot drives on separate hard drives. Congrats!


-
elite.mac2@gmail.com

Friday, June 18, 2010

Re-Install Problem

Hey guys- for once, I'm gonna ask you for help. I jst re-installed Mac OS X from a legit Mac OS X Snow Leopard disc, and now whenever I try to burn an image in Disk Utility, I get the following error:
Have u guys ever had this problem? Any advice? PLZ HELP!?!?!

Thursday, June 10, 2010

iOS 4

Also in the summer comes the iOS 4 update for iPhones 4 and 3Gs, and iTouches 2G and 3G. (Yay i have a 3g itouch!) The iPhones and the iTouch 3G get all the features.
Some of the AWESOME features are:
- multitasking
- background for homescreen
- folders for homescreen organization
- iBooks for iPhone and iTouch
- improved mail app
- zoom in camera (obviously, for iPhones only) It is free for iTouches!

iPhone 4

iPhone 4 has been friggin released! It is the awesomest thingy eva!! You HAVE to get it! Here's a picture:


See it at apple.com/iphone! IT PWNS!
Hello guys- I'm going to show you how to backup your install DVDs or virtually any CD-Rom and DVD that you want to keep a copy of as a file. So that you can make a complete copy of the media in case something happens to the original, like u spill your coffee on it or ur dog cracks it, etc etc. To show you, I will make a backup image of my Aperture 2 Install DVD.

1. Insert the media in your computer.
2. Open Disk Utility, located in the Utilities Folder in your Applications Folder.

3. Click on the actual DVD/CD in the left sidebar, not the drive hardware name.


4. Once it is selected, click 'New Image' in the top toolbar. In the save dialog box (shown below), choose a place to save the backup image and a name for the backup (for me, Aperture 2 DVD), but leave everything else Untouched. The ONLY exception to this is if the media is bootable (For example, a Windows or Mac OS X Install DVD). In that case, change the image format to DVD/CD Master. Now, click save.If you see a dialog box like the one below, u r good to go!


Now, if you want to make a complete copy of the DVD/CD onto another blank DVD/CD:
1. Get a DVD/CD big enough to fit the .dmg or .cdr file you created above. Insert it in your computer.
2. Open Disk Utility. Select the image you created above in the left sidebar (bottom part). If it isn't there, drag it there from the Finder. Now, select the image. Click burn in the top toolbar. Select the highest burning speed and other options you decide. Now, click burn. Congrats! You have a complete clone of the original DVD/CD. :-)

Awesome Mac Background

Hey if u are running either mac or windows, I have a really cool image to give you for your desktop. It is the Mac OS X Server desktop image, which is a cool blue and purple version of the default Mac OS X purple one. Email me at elite.mac2@gmail.com If you want it. Thanks!
Here's a pic (But don't try using it for your desktop background cuz the pixels have been degraded, and it is a very small resolution (won't fit your screen), and also it's not just the image, so it's useless for u:

How to change the icon for basically anything on Mac

To change the icon of a drive, file, folder, etc.:
1. Right-click on the file/folder/drive w/ the icon that you want to put on another thing.
2. Click 'Get Info'
3. On the top left-hand corner, the icon is there. Click on it once so that it is outlined in blue, and then press CMND-C (Copy). Close the window.
4. Right click and click 'Get Info' on the file/folder/drive which will get a copy of the icon.
5. In the same top left-hand corner, click the icon once, and press CMND-V (Paste). Congrats! The only time this won't work is if you don't have 'sufficient privileges' for the destination item.
Thanks!

Followers...

Hey dudes- if you are reading this, PLEASE FOLLOW MY BLOG!! Click follow in the right sidebar. Thanks! :-) U guys rock!
- elite.mac2@gmail.com

Creating a BootCamp Partition

Bootcamp is a utility that allows you to run windows on a mac. You can boot of a windows drive and it'll be just like a PC! Here's how:
1. Back up your important files manually or with Time Machine.
2. Open the Bootcamp Assistant, located in the Utilities Folder in the Applications folder.


Now it will show you a screen which will allow you choose how much space to partition for the Windows drive. Drag the bar to your choice, and then click whatever it says, like 'continue'. Sorry I can't show pictures of this screen- I already have done this and to do it over I would have to delete my Windows Drive :-(. Then, it'll give u 2 options. If you want to begin installing Win now, insert your Windows Install DVD and choose the reboot option, then click reboot. I you want to do it later, quit the Assistant. When u want to do it, insert the disc, open system preferences, go to 'Startup Disk', select the DVD, and click 'Restart'. Hope it helps!

Spirit Jailbreak

The Spirit Jailbreak was released a few days back, which is a new jailbreak for the latest Firmware updates (3.1.2, 3.1.3, and 3.2) on iPad, iPhone, and iTouch. IT IS UNTeTHERED!! That means that now you can turn your device on and off and it'll still be jailbroken! Awesomage! Download from http://spiritjb.com/.

The beginning of a revolution...

Welcome people! This is a blog I have been dreaming of making for a long, long time. This is a blog available to anyone; this blog will, from now on, give you constant tips, tricks, and news on macs and other Apple devices. I will keep this blog going for many years, and my goal is to have more than a thousand people be fans of my sight. If you really like my blog, email me at elite.mac2@gmail.com to tell me; you can also email me at that address with mac questions. Thanks! And so we go...